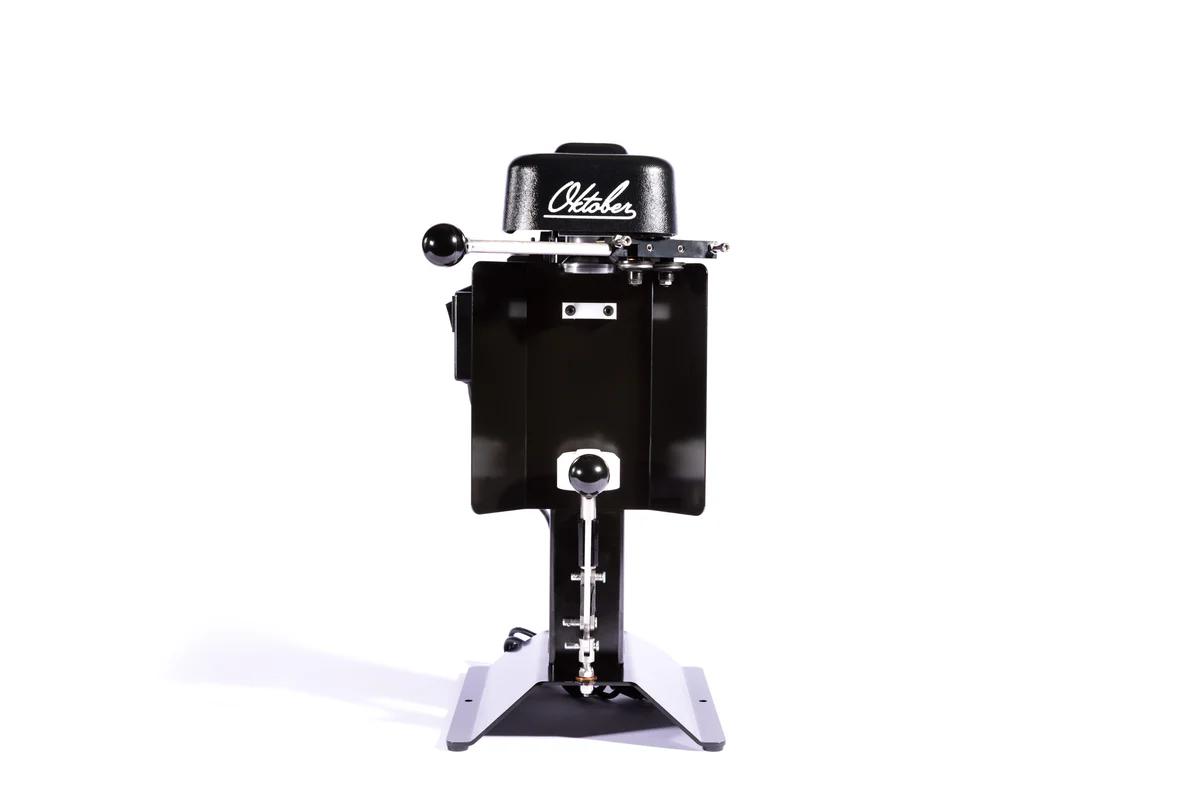
Canning beer at home has been a passion of mine for years, but it’s always come with a few challenges—especially when it comes to keeping things clean. After investing in the Oktober SL1 Can Seamer, I was impressed by the machine’s performance and reliability. Still, there was one issue I hadn’t solved: splashes and spills that turned every canning day into a messy affair. That’s when I came across the splash guard designed specifically for the SL1, and I decided to put it to the test. In this oktober sl1 splash guard review, I’ll share my hands-on experience, how it transformed my workflow, and whether it’s a worthwhile upgrade for your setup.
Unboxing and First Thoughts
When the splash guard arrived, I was pleasantly surprised by how lightweight yet sturdy it felt. It came packaged securely, with no unnecessary extras—just the clear acrylic shield and mounting hardware. The guard is made of transparent material, which is essential because I didn’t want anything obstructing my view while seaming cans. It felt well-constructed right out of the box, with no rough edges or signs of poor craftsmanship.
Installing it was a breeze. I had it mounted to my SL1 Can Seamer in less than ten minutes, using only the included hardware and a screwdriver. The guard snapped into place without forcing anything, which immediately told me it had been designed with actual brewers in mind.
Why I Decided to Upgrade
Before diving further into this oktober sl1 splash guard review, it’s worth discussing why I even considered this add-on. Every homebrewer knows the frustration that comes from foamy overflows during the canning process. I’ve lost count of how many times I’ve finished a canning session only to find dried beer streaked across my workbench, machine, and even my clothes.
Cleaning up was always a time-consuming hassle, and I constantly worried about sticky beer residue interfering with the performance of my equipment. After reading about other brewers using the splash guard to cut down on cleanup time and improve their canning process, I figured it was time to see if it could make a difference in my own homebrew setup.
A Real Test in My Homebrew Operation
I decided to put the splash guard through its paces with a full 5-gallon batch of my double dry-hopped IPA—a brew notorious for its head retention and tendency to foam up during canning. With everything prepped and sanitized, I got to work, filling 16-ounce cans one by one.
The first thing I noticed was how seamlessly the splash guard fit into the process. It didn’t interfere with my visibility, which meant I could keep an eye on the fill level and ensure everything was running smoothly. More importantly, the usual foam bursts and splashes that would have hit the seamer or nearby surfaces were now safely contained within the guard.
Even after can number 25, the guard hadn’t budged or needed readjusting. It stayed firmly in place, catching every tiny splash without requiring me to slow down or modify my technique. For the first time, I finished a canning session without needing to wipe down half my workspace.
Compatibility and Design Details
One of the highlights I need to emphasize in this oktober sl1 splash guard review is how well the guard integrates with the SL1 Can Seamer. It’s not a one-size-fits-all product forced to fit; it’s tailored specifically for the machine, so there are no awkward gaps or balance issues. The mounting brackets lined up perfectly, and everything felt snug once attached.
I also appreciate that the guard doesn’t obstruct access to the machine’s critical functions. I use a foot pedal to operate my SL1, and I didn’t have to reposition or modify anything to keep my workflow intact. The guard doesn’t interfere with inserting cans, adjusting the seamer, or inspecting seams afterward.
Ease of Cleaning and Maintenance
Something every homebrewer can relate to is the need for quick cleanup and hassle-free maintenance. The splash guard checks all the right boxes here. After finishing my IPA canning session, I simply removed the guard and rinsed it under warm water. There were a few sticky spots, but they wiped off easily with a soft cloth and a little PBW solution.
Over a few weeks of use, I’ve noticed no yellowing, fogging, or wear on the acrylic. It remains crystal clear and scratch-free, which speaks volumes about its durability. I keep it stored upright when not in use, and it looks just as clean now as it did when I first opened the box.
Workflow Improvements You Can Feel
Canning used to be the messiest part of my brewing process, and it often felt like a chore I had to endure rather than enjoy. With the splash guard in place, I’ve noticed a significant shift in my mindset. I no longer dread the cleanup or worry about beer spraying on nearby equipment. This peace of mind makes the entire process smoother and more efficient.
In fact, I’ve found myself canning more frequently. Instead of avoiding it, I now look forward to packaging my beers, knowing that I can maintain a clean, professional workspace throughout the session.
Practical Benefits Beyond Cleanliness
As I continued to test the guard, I noticed other perks that hadn’t initially occurred to me. For one, it helps maintain the hygiene of the seaming area. By minimizing splashes and drips, I reduced the risk of introducing contaminants to the machine’s moving parts or surfaces where the cans rest.
Another unexpected benefit was how much beer I saved. In the past, foam overflow often meant losing small amounts of beer with every can, which added up over time. Now, with the splash guard helping to contain that foam, I noticed less waste and more efficient use of every batch.
Ideal Use Cases and Who Should Buy It
If you’re already using the SL1 Can Seamer regularly, this accessory is almost essential. Whether you’re a weekend hobbyist like me or a serious homebrewer looking to streamline your process, the splash guard adds convenience and cleanliness without complicating your setup.
It’s also perfect for brewers who share a workspace. If you’re canning in a shared garage or kitchen, keeping beer splashes to a minimum is not just practical—it’s courteous. Anyone brewing in a confined or multi-use space will appreciate how this small tool reduces mess and stress.
Value for Money and Overall Impressions
When weighing the cost of the splash guard against the value it delivers, I’d say it’s absolutely worth it. The time it saves in cleaning, the beer it prevents from being wasted, and the professional look it brings to my setup all contribute to its value. It’s one of those rare accessories that genuinely enhances every session.
In wrapping up this oktober sl1 splash guard review, I want to emphasize just how much this product has improved my overall brewing experience. It doesn’t change how your beer tastes, but it certainly changes how enjoyable the canning process can be. From the first pour to the last seam, the splash guard quietly keeps everything clean, efficient, and frustration-free.
Final Verdict
After several weeks of use, I can confidently say that this is one of the most practical upgrades I’ve made to my brewing station. It’s well-built, easy to install, and even easier to clean. More importantly, it delivers real benefits—less mess, smoother workflow, and better hygiene.
If you’re considering an accessory that improves your day-to-day brewing process without requiring a huge investment or learning curve, this is the one. The oktober sl1 splash guard review ends on a high note: it’s a small product that makes a big difference, and I wouldn’t want to can without it again.


